• Home
  • Tips & Advice
  • Blog
  • Contact
  • About

The Horse Gal - Horse Training Tips & Videos, product reviews, horse health and management

Horse information, tips, advice, training, product reviews

  • Health & Care
  • Products/Reviews
  • Tack & Gear
  • Trail Rides
  • Training
  • Dog Stuff
You are here: Home / Archives for Training

Rein & Leg Management

Richard Winters

Performance Horsemanship
with Richard Winters

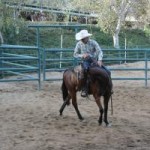
In this article I want to discuss how rein and leg positions communicate to and control different parts of your horse’s body.

There are four basic positions for each rein. Each position communicates something different to your horse. It’s important that you bring clarity to each signal your horse receives. These four positions are: direct rein, indirect rein, supporting (neck) rein, and a neutral rein.

What rein controls my horse’s front end?

A direct rein leads my horse’s front end in the direction of my hand. This is accomplished by my hand coming out directly to the side in a lateral movement. If I am loping a left hand circle I would lead my horse through the turn with a direct left rein. If I am asking for a spin or roll-back I would also initiate it with a lateral direct rein.

What is my opposite rein doing at this time?

The opposite rein becomes my supporting or neck rein. As I lead the front end across with my direct rein I lay the opposite rein up against his neck to support him through the turn. By leading with a direct rein and supporting with the opposite rein, my horse will begin to understand the concept of neck reining over a period of time.

Keep this in mind in regard to neck reining: neck reining itself can never be anything more than a suggestion. If you try to enforce neck reining with heavier pressure on that same side, you’ll bend your horse’s nose to the outside, away from the direction you wanted to go. If your horse does not yield away from the neck rein and into your desired direction, then you need to help him with some more direct rein. Using the direct rein and supporting rein in harmony will help you clearly lead your horse’s front end in the direction you wish to travel.

What should my legs be doing at this time?

Here is an easy way to avoid getting confused – your hands and your legs will do the same thing. If you are leading the front end across to the left, your left hand is out to the left side. Your left leg should also be out away from your horse’s body. This opens up the direction you want to go. In this left hand turn, your right rein is up along your horse’s neck as a supporting rein. Your right leg would also be against your horse’s right side. This right leg is suggesting that your horse yield to the left. In this way your hands and legs compliment each other and bring clarity to your suggestion.

What rein controls my horse’s hindquarters?

The indirect rein controls your horse’s hindquarters. Hindquarter control is critical to ultimate control of your horse. If you can disengage his hindquarters then you can readily defuse volatile situations such as bucking, spooking, and running off. This is achieved by drawing the rein up towards your body. If you are using the left rein you can imagine an imaginary straight line from the left rein to your right shoulder. What is your opposite rein doing? It will be a neutral rein. This is important to point out. I observe many people with tension on this opposite rein and thus send confusing signals to their horse. You want the neutral rein to be slack during this maneuver when moving the hindquarters.

As with the previous rein positions, your legs will do the same thing your reins are doing. When you lift your left rein up toward your body as an in-direct rein, your left leg will be against your horse’s side to help yield the hindquarters over. Your opposite rein is neutral and your right leg is also neutral away from your horse’s right side.

These are basic positions and maneuvers. Understanding them is elementary, yet crucial. These are many subtle and nuanced advanced positions, as well. However, they will all have their origins in these four basic positions.

Understanding these positions and being comfortable in their executions will better prepare you and your horse for more advanced performance horsemanship.
Working with your Colt at the Halter

How to lead a colt into the stable and hitch him without having him pull on the halter.

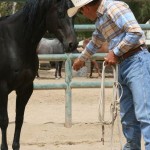
You should lead the broke horse into the stable first, and get the colt, if you can, to follow in after him. If he refuses to go, step up to him, taking a little stick or switch in your right hand; then take hold of the halter close to his head with your left hand, at the same time reaching over his back with your right arm so that you can tap him on the opposite side with your switch; bring him up facing the door, tap him lightly with your switch, reaching as far back with it as you can.

This tapping, by being pretty well back, and on the opposite side, will drive him ahead, and keep him close to you, then by giving him the right direction with your left hand you can walk into the stable with him.

I have walked colts into the stable this way, in less than a minute, after men had worked at them half an hour, trying to pull them in.

If you cannot walk him it at once this way, turn him about and walk him round in every direction, until you can get him up to the door without pulling at him. Then let him stand a few minutes, keeping his head in the right direction with the halter, and he will walk in, in less than ten minutes.

Never attempt to pull the colt into the stable; that would make him think at once that it was a dangerous place, and if he was not afraid of it before, he would be then. Besides we don’t want him to know anything about pulling on the halter. Colts are often hurt, and sometimes killed, by trying to force them into the stable; and those who attempt to do it in that way, go into an up-hill business, when a plain smooth road is before them.

If you want to hitch your colt, put him in a tolerably wide stall which should not be too long, and should be connected by a bar or something of that kind to the partition behind it; so that, after the colt is in he cannot get far enough back to take a straight, backward pull on the halter; then by hitching him in the center of the stall, it would be impossible for him to pull on the halter, the partition behind preventing him from going back, and the halter in the center checking him every time he turns to the left or right.

In a state of this kind you can break every horse to stand hitched by a light strap, anywhere, without his ever knowing any thing about pulling.

If you have broke your horse to lead, and have learned him the use of the halter (which you should always do before you hitch him to any thing), you can hitch him in any kind of a stall, and give him something to eat to keep him up to his place for a few minutes at first and there is not one colt in fifty that will pull on his halter.

Extracted from the ebook How to Tame and Train Wild and Vicious Horses

Little Things Make A Big Difference

Richard Winters

I define horseback riding and horsemanship as two separate categories. If you are simply a horseback rider, you’ve acquired a few basic skills that keep your mind in the middle and a leg on either side. Horseback riding is simply the act of not falling off. Almost anyone can be a horseback rider.

Horsemanship, on the other hand, is more of an elite club. If you are an aspiring horseman or woman, you’re now on a lifelong journey learning the thousand little things that make the big difference and will elevate you from horseback rider status to the ranks of true horsemanship.

Here is a very limited and incomplete list of little things that, by themselves, might not seem that important. However, when you put them together with 993 other things, they make the big difference.
1. Catch a spooky horse

Have your halter and lead rope organized in your hand before you approach the horse. A touchy colt might not hang around long enough for you to get things untangled and prepared.
2. Make your cinching up process a gradual two or three step procedure

Cinching too tight, too soon, at best can create a crabby horse with ears pinned back. At worst it will cause some horses to get cinch bound. This phenomenon will result in pulling back, falling down, flipping over, and a lot of other things you don’t want to happen.
3. Loosen up the reins

Often riders can be seen sitting casually on their horse with slight tension on the reins. When you have completed a maneuver, drill, or exercise, and you are standing still, make sure your reins are draped. Otherwise your horse will begin to pull on your hands to create slack and you’ll only stiffen and dull the feeling in your horse’s face.
4. Take time to hesitate

Sometimes when you’re doing nothing you really are doing something. After a stop, spin, negotiating an obstacle, or any other maneuver, stopping and waiting in those exact tracks is a great way for your horse to mentally digest what has just transpired. It also allows him to stay quiet and relaxed during a training session.
5. Allow you horse to cool down physically and mentally after a training session

When I was a young man, I worked for a horseman who had a very specific routine for his performance horses. He figured he had an hour to devote to each horse. He allotted 20 minutes for warming up, 20 minutes for serious training, and 20 minutes for cooling down. You don’t need to follow that exact regiment, but the underlying principle is important. You’re not riding a machine. Allowing your horse to relax and cool down after a workout will help keep his mind right and his attitude fresh.
6. Back your left foot almost all the way out of the stirrup before dismounting

I’ve observed countless riders step down and physically remove their left foot from the stirrup with their hand. If a horse spooks unexpectedly, the rider can be hung up and drug. Trust me, that’s no fun.
7. Keep your horse from getting gate and barn sour

At the end of a training session, ride your horse away from the gate, step off, loosen your cinch, and lead your horse back to the barn. It might not be the most convenient thing to do, but it will help with those horses that are always gravitating back toward the gate.

Only 993 more little things left to learn before becoming a part of the elite horsemanship club. These subtle, sometimes seemingly insignificant things can truly make a big difference in your horsemanship journey. I mention them because I watch scores of riders ignoring these concepts and thus hindering themselves from obtaining the next level of horsemanship. These are the types of things that separate the average horseback rider from the true horseman or woman. It’s the little things that make the big difference.

About the author
Richard Winters is a performance horse trainer with a natural horsemanship touch. For over 20 years, he has helped people with their horses through his training programs, clinics, DVDs, and his presentations at horse expos. His horsemanship is universal, ranging from reined cow horses on the Western side to jumping and dressage on the English side. Learn more about Richard at www.wintersranch.com.

Tags

Airflex Straight Cinch coggins dog gifts equestrian supply equine colic equine gastric syndrom foal care horse horse behavior horse bits horse blankets horse care Horse cinch horse colic horse fly control horse gifts horse health horse jewelry horse management horse nutrition horse problems horse riding helmets horses horse supply Horse tack horse trail rides Horse training horse treats how imporant is water for your horse how to prevent colic in horses how to train a horse jolly balls Mare and Foals mare breeding paste wormers prevent colic reining horses saddle pads tack shop the horse gal The Horse Gal's Blog the horse gal mission trail riding training a horse Winter horse care

Lead Changes & Departures

Recent Posts

  • Bear Spray – Should You Carry?
  • Dave Vietor Memorial – A Tribute to a Great Horseman
  • The Holidays ~ Montana Style
  • Zimecterin Gold Kit – By 2 and get a FREE Banixx
  • When to Blanket your Horse
  • 10 Plants Poisonous to Horses
  • Imprinting your Foal
  • Blowout Western Sale at Horse.com!
  • Electric Pasture & Paddock Fences Overview
  • Essential Horse Supplies for Your Barn’s First-Aid Kit

Return to top of page

Copyright © 2025 · Genesis Theme Framework by GenieLadd · thehorsegal · Log in