• Home
  • Tips & Advice
  • Blog
  • Contact
  • About

The Horse Gal - Horse Training Tips & Videos, product reviews, horse health and management

Horse information, tips, advice, training, product reviews

  • Health & Care
  • Products/Reviews
  • Tack & Gear
  • Trail Rides
  • Training
  • Dog Stuff
You are here: Home / Archives for Tips & Advice

Tips & Advice

The Canter

Horse at the Canter

The working canter is the canter used from the beginning of a horses training, this has 3 beats and is classed as ‘three time’. The sequence of horse’s foot falls is as follows:
• Outside hind leg
• Inside hind and outside fore at the same time
• Inside fore leg
• This is then followed by a moment where all horse’s feet are off the ground at the same time momentarily. This is called the moment of suspension.

The horse can canter with a left or right foreleg lead. The lead is determined by whichever foreleg reaches the farthest forward on landing. This three time movement causes a rocking motion when ridden.

A disunited canter is a very common fault when cantering. A united canter should always be worked towards and this is classed as such when the horses leading foreleg and leading hind leg appear to be on the same side. When cantering ‘disunited’ the leading hind leg appears to be on the opposite side to the leading foreleg.

Common reasons for a disunited canter are often attributed to lack of strength, fitness, tension or a physical problem. It is vital that any sudden appearance of a ‘disunited’ canter be addressed. This could be symbolic of a physical reason why the horse cannot engage. Firstly ask yourself whether you have upped the level of training given to your horse, are you asking too much? Should his fitness be improved a little slower in order for him to be able to work up to this new level of training you are asking from him? Are the exercises you are asking too advanced? Are the circles too small or turns too sharp? If your horse becomes disunited, gently bring him back to a trot, rebalance him and start again.

The four time ‘disunited’ canter will feel uncomfortable to site to and can often be a result of the working canter being shortened by the reins alone. The result is a shuffling or incorrect canter gait. The diagonally opposite legs that are supposed to land at the same time, land individually. The three time beat of the working canter should always be maintained. If lost the three time canter can be re-established by riding actively forward. Often adopting a forward jumping seat can help the horse establish a forward going canter again which once established you can slowly sit up again and maintain the energy and impulsion.

Straightness in the canter is essential. This will ensure the horse’s weight is distributed evenly on both sides. If this is not the case uneven wear and stresses can be placed on continuously over used limbs. Straightness will enable the horse to push equally and effectively with their hind legs; these being the driving source of this gait. With a straight canter the rider will be able to keep the horse accurate on their aids and will be able to maintain a level and even contact on sides, assisting and enabling correct collection throughout the gait.

Correcting a crooked canter:
• Ride the horse in a shoulder in position. By bringing the horses shoulders in off the track fractionally you are teaching the horse to become even more responsive and to move away from your leg. This will allow you to correct the horse more effectively if he moves away from the straight working line.
• Work generally on suppling exercises for your horse; work on circles, turns and other lateral exercises enabling your horse to be more laterally supple. This will decrease his favouritism for one size.

Tammy is an avid horse rider who loves to go for long distance horse rides and also to bake cakes with her children.

Supplements; Finding the Right Balance

As a horse owner, you understand that horses need various levels of feed and nourishment in their diet. The amount is dependent on age, weight, activity level and its overall health. They all have special dietary needs. Your horse’s health is delicate balance of finding the correct proteins, grains, hay, horse supplements, water and suitable digestions of all these substances. With so many different types of supplements and feeds available, finding the right balance is a challenge for new and veteran horse owners alike.

In the past, electrolytes were eyed with suspicion by a few horse owners. However numerous medical researches have shown their efficiency and the use of electrolytes in equine diets is now an acceptable practice. Some horse owners worry about adding electrolytes to the feed; others do the opposite and over-supplement. Be careful because this can do more harm than good in most instances. The best results of using electrolyte supplements is if minimal levels are added during major events such as if the horse is involved in a competition.

Vitamins, more specifically vitamin E, have been credited with everything from improved health, better well being, and anti-aging properties in humans. So obviously it wouldn’t be long before researchers began to realize the importance of this vitamin in the equine kingdom. Naturally, there has been a movement to supplement the feed of broodmares and also performance horses with vitamin E. These types of horse typically are more stressed than their non-working counterparts and can benefit from the added vitamins.

Recently, it has been found that horses that have a tendency to tie-up greatly benefit from elevated levels of vitamin E in their feed. In order to receive the highest benefit, the supplements must be given in combination with a fatty feed. Vitamin E is a fat soluble vitamin and therefore it prevents oxidization.

Among horse supplements, another important antioxidant is vitamin C. You’ll find that the biggest difference between vitamins E and C is the fact that vitamin E benefits the cell membrane while vitamin C helps the insides of actual cell itself. Horses can also be given beta carotene since it helps the body to heal itself.

Be sure to ask your horse’s veterinarian about the correct dietary plans for your equine’s particular needs. Every horse is special and unique. Make sure its dietary plan meets the amount needed to match its exercise program. This is essential especially if your horse is sick, pregnant, lactating, aging, under stress, etc.

Article by: Ted Stinson is a horse enthusiast who writes various articles on horses and the best methods of caring for a horse. Many of his topics include subjects ranging from the best riding boots to use to what type of horse supplements work best.

Temperature, Pulse and Respiration in a Horse

Equine Vital Signs
Temperature, pulse, and respiration (TPR) are the basic physiological parameters every horse owner or care provider should know if he or she wants to take proper care of a horse. These three vital signs are very important and can greatly help you and your veterinarian when you think your horse might be sick. Just knowing the normal values for these three vital signs can provide great insight about your horse’s physiological state.

Normal TPR
To know if your horse’s TPR values are abnormal, you first need to know what is normal. Although the normal heart rate for most horses is 32 to 36 beats per minute, some horses have lower heart rates, 24 beats per minute, or maybe slightly higher heart rates, 40 beats per minute.

You will need a thermometer, a stethoscope, and a watch with a second hand or one that counts seconds. A digital thermometer should be used because the time required for a reading is much less and it is more flexible than a glass mercury thermometer.

The thermometer should have a small hole at the end so a long piece of brightly colored string or tape can be attached to help find the thermometer if it is dropped or lost in the stall. A small clamp or clothespin can be placed at the end of the string so it can be attached to the horse’s tail and left in place until the temperature can be read. In that way, you do not have to hold the thermometer in place. You can purchase these thermometers at any drug store.

The stethoscope is used to clearly hear the heart beating and the sounds of breathing. An inexpensive stethoscope can be purchased at a drug or horse supply store that will be sufficient to hear the heartbeat and determine a heart rate (pulse) and respiratory rate.

Temperature
Rectal temperature is easily taken on most horses by placing a small amount of lubricant (petroleum jelly) on the thermometer. Approach the horse from the side; do not stand directly behind the horse in case they decide to kick. Raise or move the horse’s tail and insert the thermometer into the anus. Thermometers designed for use with livestock have a ring on the top. This ring can be attached to a string and a clip attached to the opposite end of the string. The clip can be clipped to the horse’s tail when you take the horse’s temperature.

The normal rectal temperature of a horse is 99.5 to 101.5°F (37.5 to 38.6ºC). Foals less than 1 month of age have a normal temperature of 100.0 to 102.0°F (37.7 to 38.8ºC). Newborn foals can easily suffer from hypothermia (low body temperature), so if the foal’s temperature is below 98.0°F (36.6ºC), call your veterinarian. In the meantime, rub the foal with towels or blankets to stimulate blood flow and/or dry its coat.

If the horse’s rectal temperature is above normal, it has a fever, not a temperature. All horses have a temperature, either above normal (fever), below normal (hypothermia), or normal.

Pulse
The heart rate can be taken without a stethoscope, but having a stethoscope makes the job easier. If a stethoscope is not handy, the pulse can be taken from the facial artery, which is on the bottom side of the jaw in a shallow groove beneath the last cheek tooth. Count the number of beats for 15 seconds, then multiply by four to calculate the heart rate in beats per minute. Remember, any excitement by the horse will increase the pulse rate.

If a stethoscope is available, listen to the heart on the left side of the horse’s chest, just behind the elbow. Each sound of the heart is considered one beat. The normal heart rate for an adult horse is about 32 to 36 beats per minute. Foal heart rates vary depending on age. Newborn foals have a heart rate of between 80 to 100 beats per minute. Foals which are a few weeks to a few months of age will have heart rates of 60 to 80 beats per minute.

Respiration
Respiration can be taken by watching the horse’s chest move in and out (an inhale and exhale is one breath) or feeling the air come out of the nostrils. The stethoscope can be used to listen to the breaths as the air travels across the trachea when the horse inhales and exhales. Respiration characteristics should also be noted. Is the sound clear? Are the breaths shallow or deep? Is there any abnormal squeaking or crackling sound associated with the breathing?

The normal respiratory rate for adult horses is eight to 12 breaths per minute. Newborn foals have respiratory rates that are 60 to 80 breaths per minute. Older foals have resting respiratory rates from 20 to 40 breaths per minute. Remember, if your horse or foal becomes excited for any reason, the respiratory rate can be temporarily elevated.

Capillary Refill Time
Another indicator of health is mucous membrane, or gum, color. Healthy horses have nice pink gums that are moist to the touch. Capillary refill time is tested by pressing your finger firmly on the gum above the front incisors and removing it quickly. The time it takes for the area to turn from white back to pink is the capillary refill time. Normal refill time is about 2 seconds. If capillary refill time is longer than 2 seconds you should note the color of the mucous membrane and contact your veterinarian.

You greatly increase your horse’s chance of surviving a serious illness or accident by knowing your horse’s normal vital signs and being able to take its vital signs in an emergency.

Craig Wood, Uniersity of Kentucky

ASR Search Engine

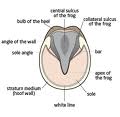
Keep your Horse’s Feet Healthy

Caring for a horse’s feet and hooves will safeguard its long-term soundness. Following are some tips to keep a horse’s feet healthy.

Shoeing or Trimming Interval

Summer

In the summer, horses should be trimmed or shod at least every six to eight weeks. However, a responsible horse owner should trim his or her horse’s hooves as often as needed. In some cases, performance horses may need more frequent trimming.

Winter

Hooves generally grow more slowly in the winter. Because of the slower growth rate, horses can be trimmed at a longer interval. For example, every six to twelve weeks may suffice. The trimming or shoeing interval depends on each horse, and the amount of hoof it grows.

Hoof Balance
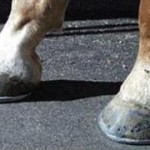
A balanced hoof allows the horse to move better and puts less stress and strain on bones, tendons and ligaments. The ideal foot has the following characteristics: a straight hoof-pastern angle, easy break-over, adequate heel support and mediallateral balance (Figure 1).

Hoof care Figure 1

Straight Hoof-Pastern Angle. There is a straight line from the pastern down through the front of the hoof wall. This allows the bones to be aligned properly from pastern to coffin bone. Mediallateral balance is exhibited as the foot landing evenly from side to side as the horse walks.

Easy Break-Over. The toe is not too long and is squared, rounded or rolled. This allows easier movement with each step. Too much break-over can result in health problems as well.

Adequate Heel Support. The shoe extends back to the end of the hoof wall and supports the back of the entire leg. Ideally, the back edge of the shoe is under a line drawn down the center of the cannon bone.

Hoof Wall Care

Hoof wall care Figure 2

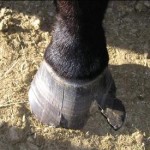
Figure 2: Hoof crack caused by long trimming interval
Weather conditions can cause damage to the hoof. During dry weather, or with frequent changes from wet to dry, horses are prone to having dry, brittle feet that easily develop hoof cracks. Prolonged trimming intervals can cause elongated toes, and the hoof wall often develops cracks due to the unsupported hoof wall (Figure 2). Unfortunately, some horses are born with poor hoof quality and are more susceptible to problems.

Treatment Tips. Apply hoof moisturizers to the hoof wall and sole during dry weather or if the hoof is brittle or developing cracks. Proper nutrition and commercially available hoof supplements can help improve hoof quality.Most importantly, trim the horse on a regular basis.

Winter Hoof Care
In the winter, special care should be taken if the horse lives outside or is turned out. Snow can ball up under the sole and cause bruising or imbalance. Ice can be very slippery if the horse is shod with normal shoes.

Winter Tips. If the horse is normally barefoot, leave the shoes off . Horses usually slip less when barefoot or not shod. Horses that are prone to sole bruising may need shoes. If the horse is shod through the winter, have snow pads placed under the shoes and small cogs, borium or nails placed at the heels. Snow pads will prevent snow and ice from building up under the shoe and the cogs or nails will allow for better traction. Finally, winter weather can dry out the hoof wall, and applications of hoof moisturizer may be needed.

Nutrition
Maintaining a horse’s nutrition can help alleviate some hoof problems. Feeding good quality hay, supplementing the appropriate amount of vitamins and trace minerals, and making sure the horse has constant access to fresh, clean water is important for hoof health and overall horse health. Poor nutrition can lead to future hoof problems, and correcting a horse’s nutrition can gradually improve hoof health. Cooperation between horse owners, veterinarians and equine nutritionists is needed to ensure proper horse nutrition.

Research has shown that horses with poor quality hooves can benefit from commercially available hoof-care products that contain biotin (20 mg/day), iodine (1 mg/day), methionine (2500 mg/day) and zinc (175 to 250 mg/day).

Common Hoof Problems

Long toes Figure 3

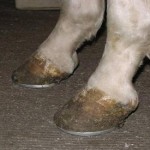
Long toes can results in collapsed heels, strain on flexor tendons and the navicular bone (Figure 3). If the horse is too upright it can cause trauma to the coffin bone and joint. An imbalanced hoof can cause stress on the collateral ligaments and joints.

Hoof Cracks. Horizontal cracks or blowouts are usually caused by an injury to the coronary band or a blow to the hoof wall. Horizontal cracks or blowouts do not usually cause lameness. Grass cracks are usually seen in long, unshod horses and can be corrected with trimming and shoeing. Sand cracks results from injury to the coronary band or white-line disease that breaks out at the coronary band. Sand cracks can be a cause of lameness. Treatment for sand cracks includes determining the cause and removing it, floating the hoof wall (not letting it bear weight), and/or fixation or patching of the crack. It usually takes nine to 12 months for the hoof to grow out.

Thrush. Thrush is a foul-smelling, black exudate, usually found around the frog, that is associated with wet, soiled conditions. Thrush can invade sensitive tissue and cause lameness. Treatment includes keeping stalls or barn clean and dry to help eliminate thrush.

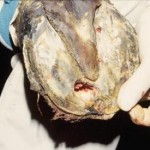
Solar Abscess. Solar Abscess is an infection in the sole of the hoof that can lead to acute or severe lameness (Figure 4).

Solar Abscess Figure 4

Solar Abscess can be caused by trauma, bruising or a foreign body. Treatments include removal of the foreign body if possible, soaking the hoof in warm water and Epsom salt, and keeping the hoof bandaged, clean and dry.

Hot Nail or Street Nail. A hot nail is a horseshoe nail that is driven into the sensitive structures of the hoof wall. Hot nails will usually cause lameness. Treatments include flushing the nail hole with antiseptic, packing the hole or bandaging the foot and administering a tetanus booster. A street nail is any foreign object that enters the foot.This is an emergency, and a veterinarian should be called immediately. Treatment depends on which hoof structure is affected.

Laminitis. Laminitis is inflammation of the sensitive laminae. Also called founder, laminitis is rotation (coffin bone rotates downward inside hoof capsule) and/or sinking (coffin bone sinks downward) of the coffin bone. There are several causes of laminitis. Treatments include regular shoeing or trimming, maintaining short toes, and frog and sole support.

Navicular. Navicular syndrome includes disease processes involving the navicular bone, bursa, ligamentous and/or soft tissue structures. Horses will usually land their toe first due to pain in the heels. Causes of navicular syndrome include hereditary predisposition (quarter horses and thoroughbreds), faulty conformation, hoof imbalance and exercise on hard surfaces. Treatments include shoeing, maintaining a short toe, elevating the heels and good break- over, and pads.

Conclusion
Since most horses have different hoof issues and growth, a good working relationship with a farrier and veterinarian is needed to ensure a healthy, sound hoof and horse. Many different foot problems can occur in horses. To reduce hoof problems, follow these important recommendations:

•Regular trimming or shoeing
•Maintain good hoof balance
•Appropriate shoeing for different weather and footing conditions
•Appropriate treatment if disease process occurs
•Maintain proper horse nutrition

Mary Boyce, DVM, College of Veterinary Medicine, University of Minnesota

Managing your foal with imprinting

It’s true that mother knows best, but a little human help doesn’t hurt either. Since Dr. Robert Miller introduced foal imprinting about 20 years ago, breeders, trainers, and owners have embraced this hands-on approach credited with producing more manageable, more trusting, and easier to train horses.

What exactly is foal imprinting? In a nutshell, it is desensitizing the foal to human interaction immediately upon birth. During imprinting the foal is handled by humans before its fight-or-flight instinct kicks in. There are two goals with imprinting: to train a horse to have little or no resistance to veterinary, farrier, and training procedures; and to establish a human dominance in the young foal’s life, leading to a more willing and trainable adult horse.

What does foal imprinting consist of? Immediately following birth, a handler gently probes the baby’s gums, teeth, ears, mouth, nose, and rectum. He or she handles the foal’s feet, applies gentle pressure to the sides and back, and introduces it to distracting sounds like the vibration of clippers, the sounds of crinkling paper, and flapping plastic. The goal is to get the foal to experience sensations it will experience throughout its life, and accept them at the earliest stage.

When is the right time to begin imprint training. Most people begin to imprint train their foal about one hour after birth, right after the foal has stood and nursed. Begin by touching the horse’s body very gently, all over. This will help the foal learn that he can be touched anywhere and it won’t hurt. And best of all, this is a lesson the horse will carry with him throughout his life! Foals who have been touched in this manner shortly after birth learn not to move into or jump away from pressure on their bodies.

One thing that is very important to note. Take care not to desensitize the area around the foal’s sides. You want to preserve sensitivity to the rider’s cues in that area! However, you do want them to understand that they should move away from pressure. You can do this by tapping them until they move. When they finally do move, stop tapping. By teaching the foal the concept of moving away from pressure early on, saddle training will be a breeze later on down the road!

Imprinting is also a great way to get your foal ready for a lifetime of easy farriery. What’s the best way to do this? Pick up and handle each foot. Be sure to lightly tap the hoof and sole with a pick. By doing this, you’ll prepare the foal for foot handling, hoof picking, and other aspects of hoof care it will encounter during its adult life.

To help the foal accept things like accepting the bit, veterinary procedures, teeth floating, and deworming, make sure you pay attention to the baby’s mouth during the imprinting process. Put your fingers in both the mouth and the nose, being sure to feel around the gums and pull the lips back. Desensitizing the mouth will ensure that you foal remains a model patient–one that your vet and dentist enjoy working with–through adulthood.

During imprinting, make sure you only touch one part of the body at a time. Continue to touch that part of the body until the foal accepts what you are doing. Never quit while the foal is resisting! To do so only teaches the horse that resistance leads to you stopping. And that’s not a lesson you want any horse to learn!

Initial imprinting takes about an hour. Over the next 12 hours, do two more five- or 10-minute imprinting sessions. A 10-minute session done once or twice a day thereafter will ensure your horse stays up to speed.

By introducing your young foal to varied stimuli, you can instill a lifetime of trust and willingness!

  • 1
  • 2
  • Next Page »

Tags

Airflex Straight Cinch coggins dog gifts equestrian supply equine colic equine gastric syndrom foal care horse horse behavior horse bits horse blankets horse care Horse cinch horse colic horse fly control horse gifts horse health horse jewelry horse management horse nutrition horse problems horse riding helmets horses horse supply Horse tack horse trail rides Horse training horse treats how imporant is water for your horse how to prevent colic in horses how to train a horse jolly balls Mare and Foals mare breeding paste wormers prevent colic reining horses saddle pads tack shop the horse gal The Horse Gal's Blog the horse gal mission trail riding training a horse Winter horse care

Lead Changes & Departures

Recent Posts

  • Bear Spray – Should You Carry?
  • Dave Vietor Memorial – A Tribute to a Great Horseman
  • The Holidays ~ Montana Style
  • Zimecterin Gold Kit – By 2 and get a FREE Banixx
  • When to Blanket your Horse
  • 10 Plants Poisonous to Horses
  • Imprinting your Foal
  • Blowout Western Sale at Horse.com!
  • Electric Pasture & Paddock Fences Overview
  • Essential Horse Supplies for Your Barn’s First-Aid Kit

Return to top of page

Copyright © 2025 · Genesis Theme Framework by GenieLadd · thehorsegal · Log in